Christmas Card Box Tutorial
By Chelsea Retherford | Living 50 Plus
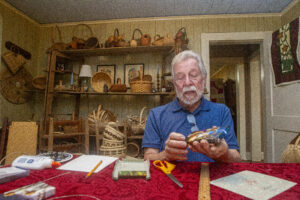
Great ideas are meant to be shared. Glenn Rikard hopes to pass on a tradition he first discovered from an old friend, Gladys Eley Harper, who saved greeting cards and turned them into tiny decorative boxes.
Below is Rikard’s step-by-step process in recreating these tiny gifts.
WHAT YOU’LL NEED: A greeting card, a ruler, a pencil or pen and a pair of scissors. Craft glue, like Elmer’s, butterfly clips, ribbon and other embellishments are optional.
STEP 1: Bend the card at its crease several times to easily tear it in half. Alternatively, you can cut the card along the crease to create two even pieces. The front of the card will become the box top. The back half of the card will be used for the bottom of the box.
STEP 2: As the bottom of the box needs to be smaller than its top, “a sliver needs to be cut from one side and one end of the back half of your card,” Rikard said. Using your ruler, trace a line about one-sixteenth of an inch from the edge, lengthwise, along one side of the card paper. Do the same along one end, widthwise. Cut each of the two thin sections away.
STEP 3: Using the ruler’s width, trace a line along each side and each end of the card paper. Do this for both pieces (front and back pages) of your card.
STEP 4: Holding your card paper vertically, take your scissors and cut the two lengthwise lines up to the line drawn along the width of the page. Do the same on the other end of the page and repeat this step for the other half of your card. See the photo below for reference.
STEP 5: Fold each of the flaps evenly to the drawn line, then take the two long flaps on both sides of your card, fold them inwards to the line drawn along the width of the card. You should be able to tuck both of these wings into the fold along the wide end of the card, as shown below. Repeat this step for both sides and both ends of each piece of card paper.
STEP 6: This step is optional but makes your card box sturdier. Unfold all of your flaps and add glue along the creases on each side and end of both pieces of card paper. Refold each flap as previously done in step 5.
STEP 7: Secure each side and end with butterfly clips and allow at least five minutes to dry.
STEP 8: Remove the clips and add any embellishments you like. Rikard completes his box by dating and initialing each one on the back. Sometimes, he adds a bit of ribbon or string to the back so he can hang his box from his Christmas tree.
These Christmas card boxes make great gifts on their own. They can be made into tree ornaments, or they can be used for a small giftbox for jewelry, gift cards, or other tiny treasures. Enjoy adding your own personal touch to these fun Christmas craft items.
Read More: Regifting the greetings of others: Glenn Rikard’s Christmas card boxes are full of memories